Your First Optimization
The same single-cube run, first in the UI, then on the command line.
In the UI
- Open the UI. Double-click the executable, or run
optimuspy ui. It opens athttp://127.0.0.1:8765. -
Add your server. OptimusPy reads your TM1 connections from a
config.ini; see TM1 Connection for its format. If you already keep one for RushTI or your scripts, open Settings, paste its path under Change file and click Link to this file. Otherwise copyconfig/config.ini.exampletoconfig/config.iniand fill in your server. The instance then shows on its own tab, and Test Connection checks it. -
Connect. Choose the instance in the sidebar's instance selector. The first time, the UI asks for the password; leave it blank if config.ini already holds it. The UI keeps what you typed until you reload the page.
-
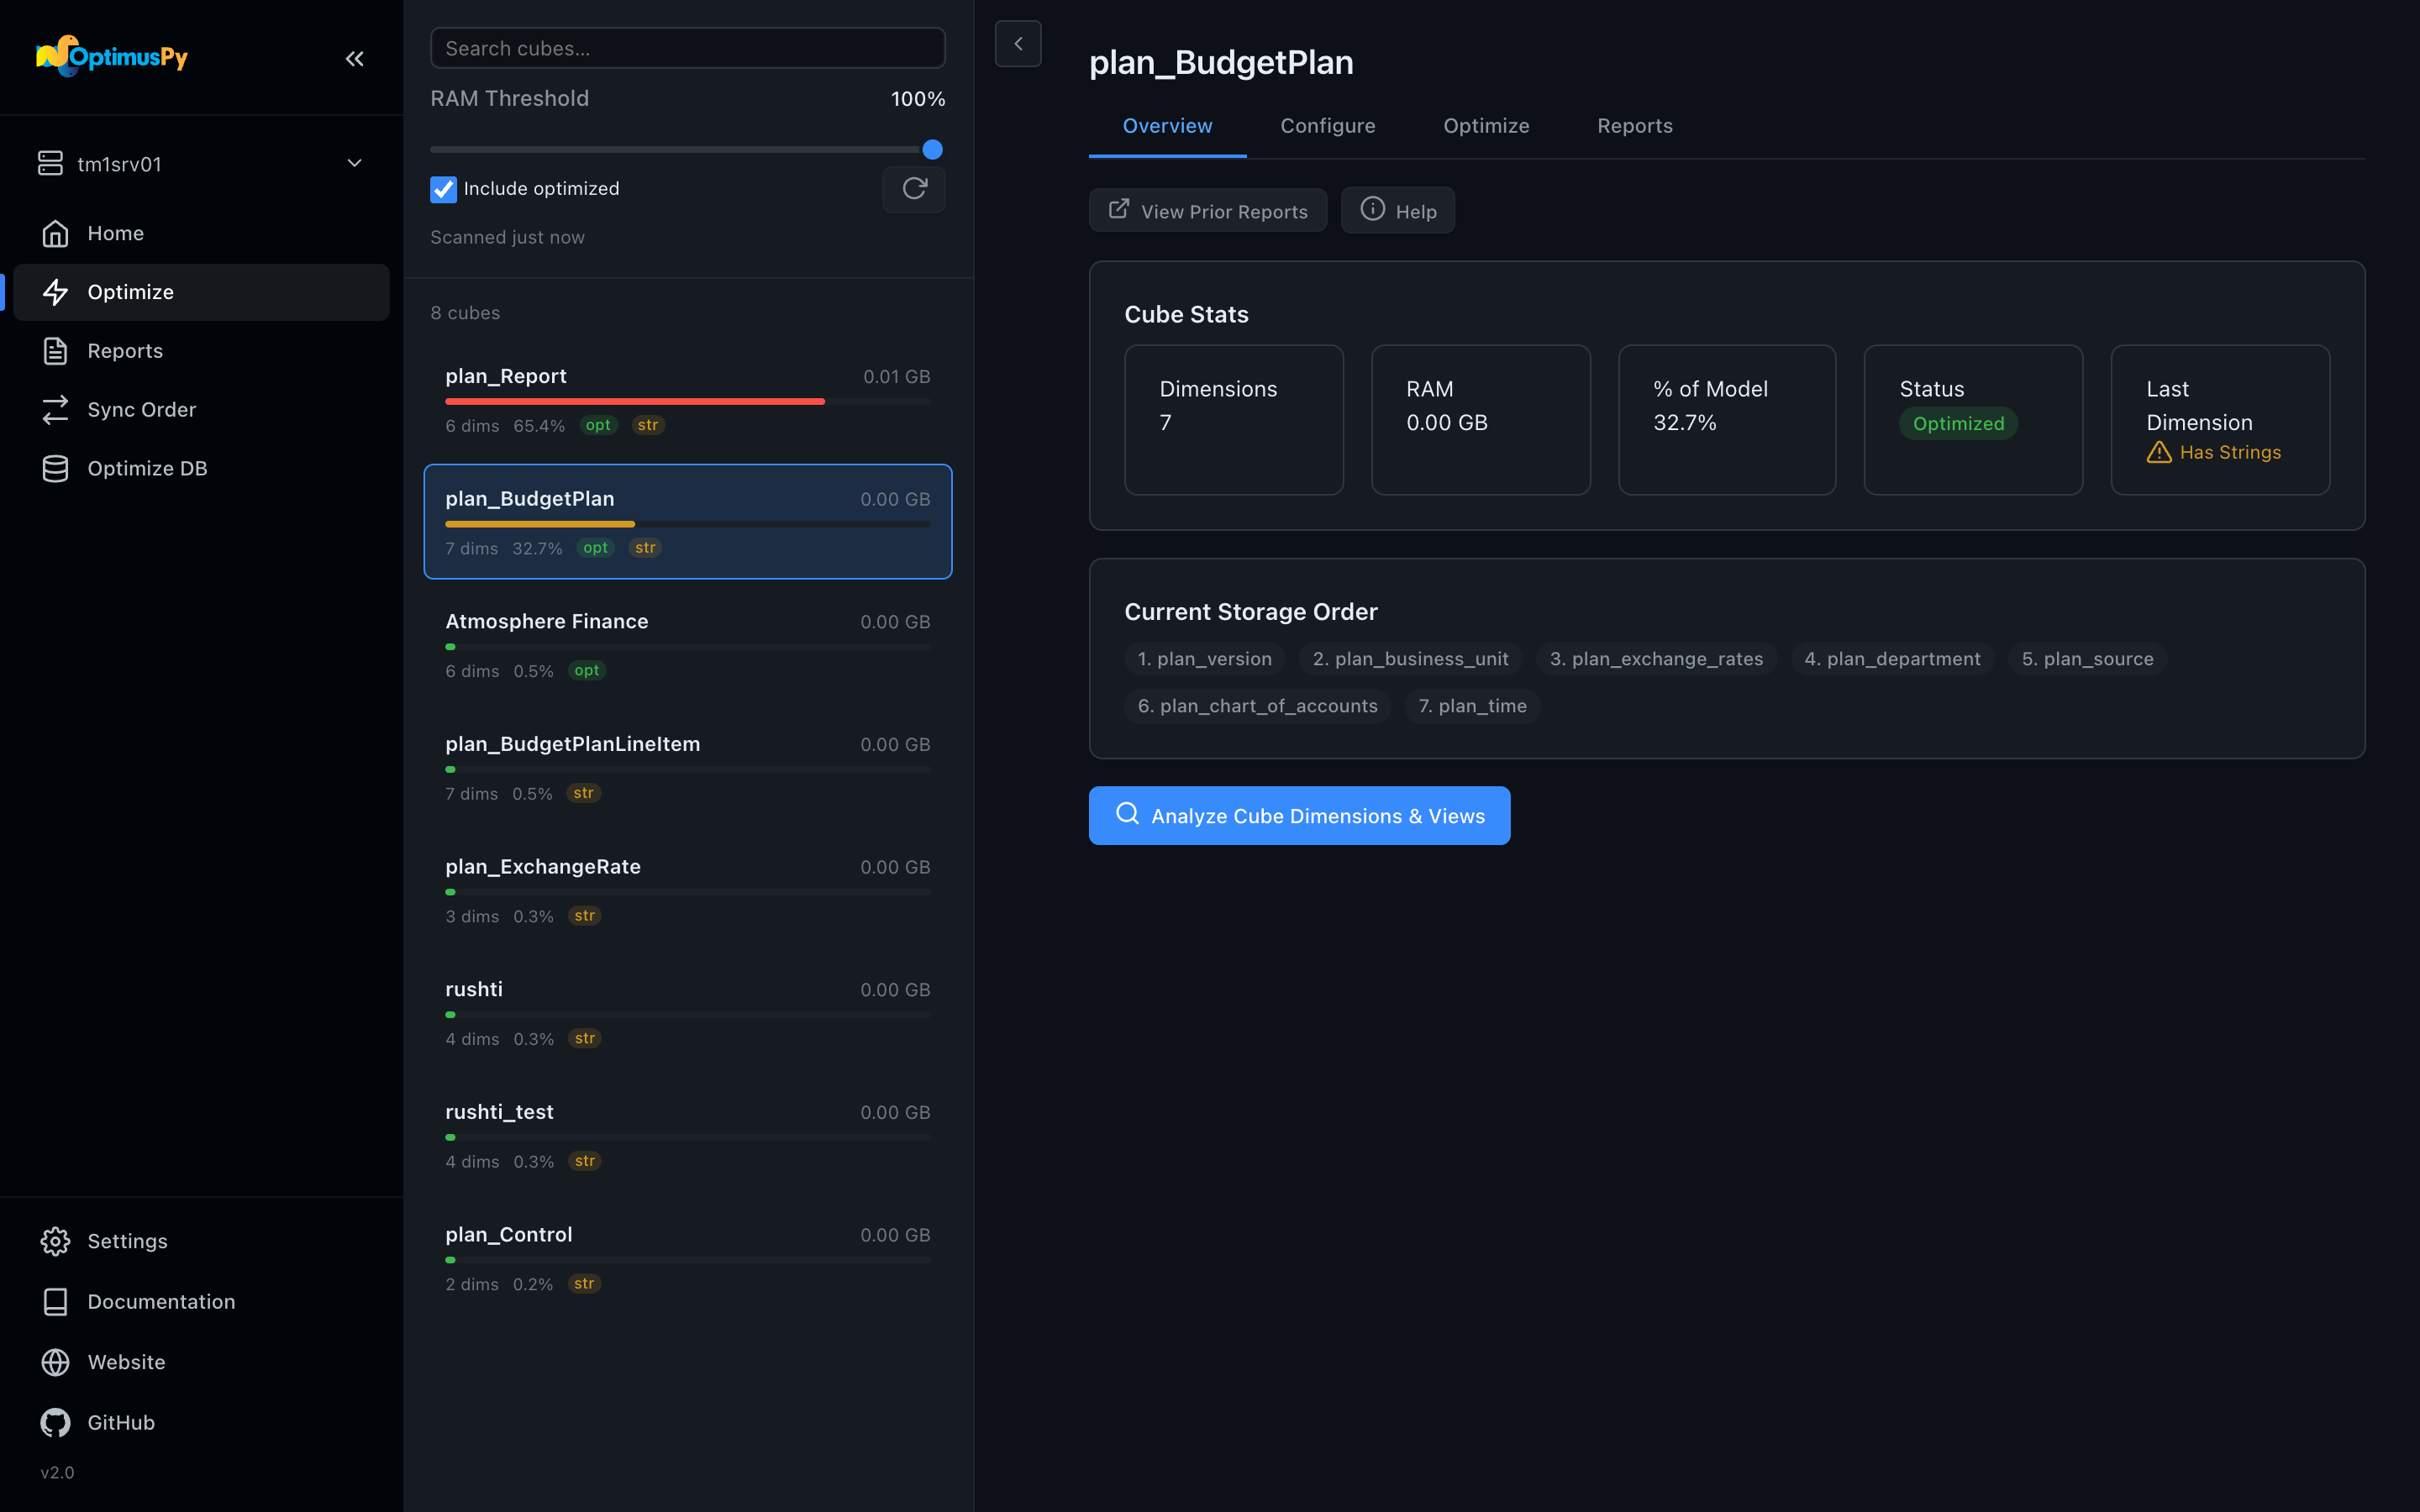
Find a cube. The Optimize page lists cubes by memory. The RAM Threshold slider limits the list to the cubes that make up that share of the instance's memory (60% by default); click the refresh button next to Include optimized to scan again after you move it. opt means the cube's storage order already differs from its visual order; those cubes are hidden until you tick Include optimized. str means the last dimension of the storage order has string elements, so it can't move.
-
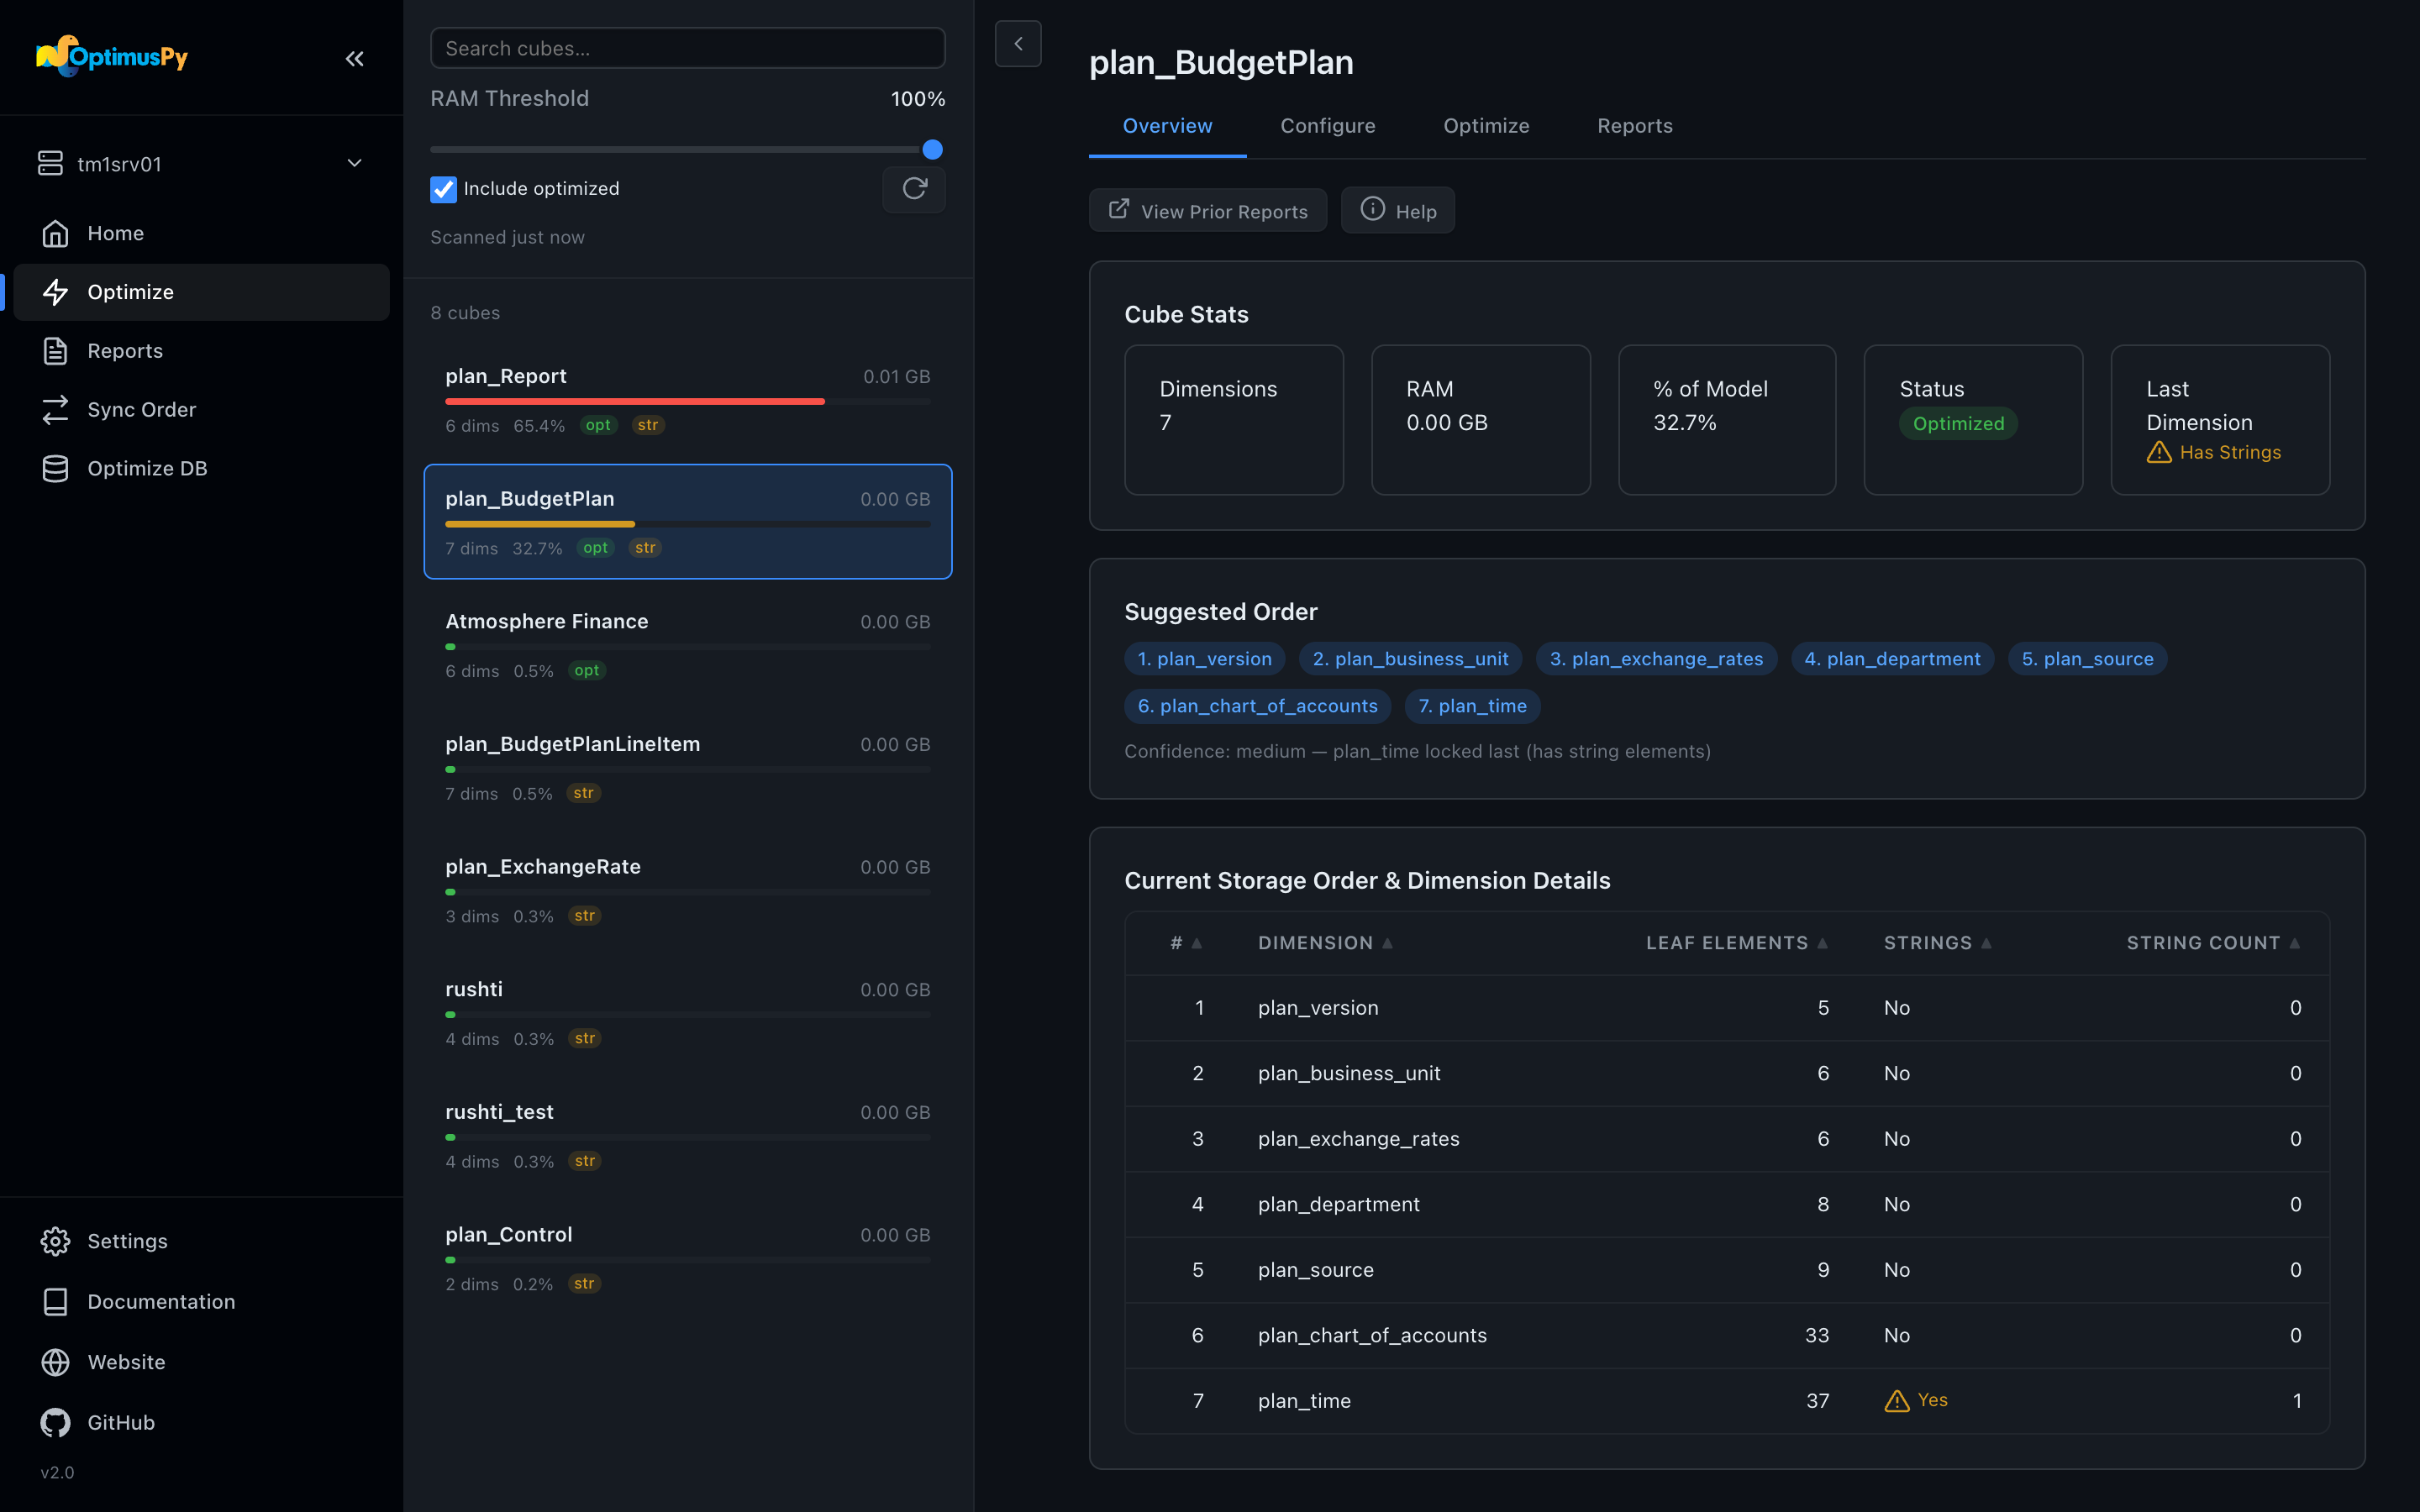
Look at the cube. Click it. The Overview tab shows its current storage order. Click Analyze Cube Dimensions & Views to add the leaf count of each dimension and a suggested order.
-
Configure the run. On Configure, keep the mode on Greedy. Pick one or more views, set Executions per permutation (5 to 10 is sensible), and choose CSV or XLSX. Leave Auto-apply best off for a first run, so the cube ends in its original order.
- Start. Click Save & Start Optimization. The Optimize tab shows the live log. Stop ends the run and puts the original order back.
- Read the report. When the run ends, the cube's Reports tab lists the run. Click Open report. See Reading the Result.
Every page of the UI is described under UI, starting with the Optimize Page.
On the command line
Describe the cube in a JSON file. samples/optimize.json is a starting point:
{
  "instance": "tm1srv01",
  "cube": "Sales",
  "views": ["Optimus"],
  "executions": 10,
  "output": "csv",
  "fast": false,
  "update": false
}
- Configure the connection. Copy
config/config.ini.exampletoconfig/config.iniand add a section for your instance. To keep the password out of the file, pass it with-p. See TM1 Connection. - Optional: find candidates.
optimuspy scan --instance tm1srv01 --output cube-configs/lists the largest cubes and writes a starter JSON for each. - Run.
optimuspy optimize sales.json. Add-vto log why any order was skipped. - If it stops. Run the same command again: it continues from its checkpoint.
--no-resumestarts over. See Checkpoints & Resume. - Find the report.
results/<instance>/<instance>_<cube>_<timestamp>.html, next to a CSV or XLSX of the same name, in the folder you ran from (for the bundle, the executable's folder). The log islogs/optimuspy.login the install folder: the executable's folder for the bundle, the repository root for a clone.
Every command and flag is in the CLI Reference, and every JSON field in the JSON Config Reference.